Create a VNet peering using the Azure portal
To create a peering connection between two VNets, the VNets must already have been created and must not have overlapping address spaces.
To create a new VNet peering from VNet-hub to VNet-spoke, connect to the Azure portal and locate VNet-hub. Under Settings, click Peerings, and then click Add to open the Add Peering blade. Use the following steps to set up a standard peering connection, as shown in Figure 4-8:
- Under This Virtual Network, choose a name for the peering from VNet-hub to VNet-spoke. This example uses “hub-to-spoke.”
- Under This Virtual Network, select Allow Gateway In ‘Vnet-hub’ To Forward Traffic
To The Peered Virtual Network. - Under Remote Virtual Network, you can choose Resource Manager or Classic. In this example, choose Resource Manager.
- Select the subscription for VNet-spoke from the Subscription drop-down menu.
- From the Virtual Network drop-down menu, choose VNet-spoke.
- Under Remote Virtual Network, type spoke-to-hub for Peering Link.
- Under Virtual Network, select Enable ‘Vnet-spoke’ To Use ‘Vnet-hub’s’ Remote Gateway.

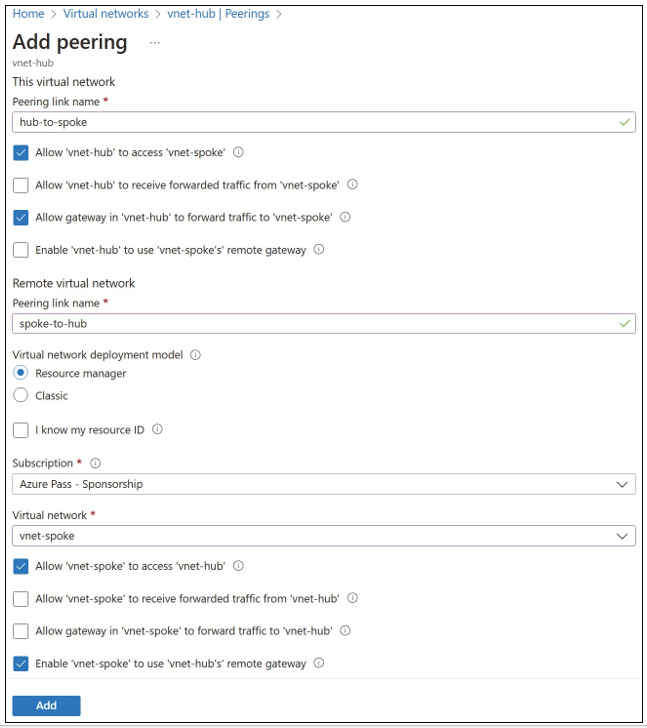
FIGURE 4-8 Adding peering from VNet-hub to VNet-spoke using the Azure portal
- Click Add to create the peering between VNet-hub and VNet-spoke. Once the peering has completed provisioning, it will appear in the Azure portal with the peering status Connected to peer network VNet-spoke, as shown in Figure 4-9.
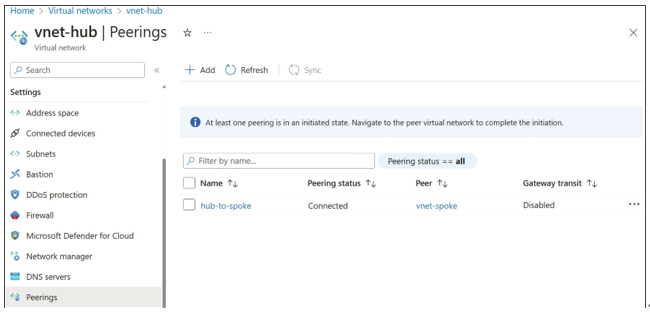
FIGURE 4-9 Hub-to-spoke peering showing as Connected in the Azure portal
- If you return to the Peering blade of VNet-spoke, you will see that the Peering Status of VNet2 to VNet1 is Connected.
Now, VNet-hub and VNet-spoke are peered, and VMs on these networks can communicate with each other as if this were a single virtual network.
Configure public IP addresses
Associating a public IP address with a network interface creates an internet-facing endpoint,
allowing your virtual machine to receive network traffic directly from the internet.
A public IP address is a standalone Azure resource. This contrasts with a private IP address that exists only as a collection of settings on another resource, such as a network interface or a load balancer.
To associate a public IP address with a virtual machine, the IP configuration of the network interface must be updated to contain a reference to the public IP address resource. As a standalone resource, public IP addresses can be created and deleted independently as well as moved from one virtual machine to another.