Create a virtual network and subnets using the Azure portal
To create a new VNet using the Azure portal, search for virtual networks. On the Virtual Net- works blade, click Create.
The Create Virtual Network blade opens. Here you can provide configuration information about the virtual network. This blade requires the following inputs, as shown in Figure 4-1:
- Subscription in which the VNet is created
- The resource group where the VNet is created
- Name of the virtual network
- The location for VNet The following values are set automatically, though you can override them as needed:
- Address space to be used for the VNet using CIDR notation
- Subnet name for the first subnet in the VNet
- The address range of the first subnet
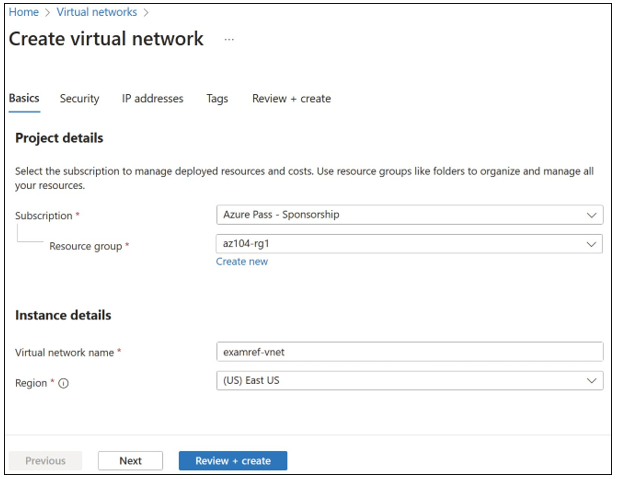
FIGURE 4-1 Basics tab of the Create Virtual Network blade
On the Security tab, you can enable common security services for the virtual network, including
- Azure Bastion This provides secure RDP and SSH connectivity to VMs in the virtual network.
- Azure Firewall This provides a layer-7 managed firewall in the virtual network.
- Azure DDoS Network Protection This provides enhanced DDoS attack mitigation with adaptive tuning, telemetry, and notifications for DDoS attacks.
On the IP Addresses tab, you can supply address spaces to be used for the VNet using CIDR notation. When creating a VNet using the Azure portal, you can specify multiple IP address ranges, and you can specify one or more subnets (see Figure 4-2). When you create a subnet, you can also create the service endpoints if you want to use any of the Azure Services.
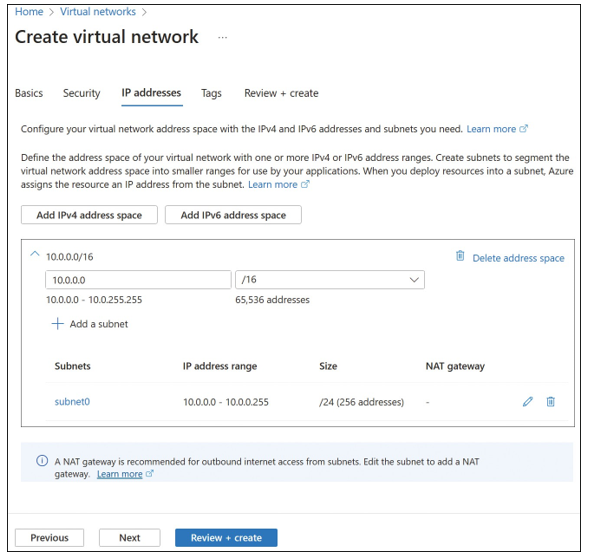
FIGURE 4-2 Define subnets when you create a virtual network
After the VNet has completed provisioning, review the settings using the Azure portal.
Notice the Subnet0 subnet has been created as part of the inputs shown in Figure 4-3.
To create another subnet in the VNet, click Subnet on the Subnets blade and complete the following fields, as shown in Figure 4-4:
- Name (of the subnet)
- Subnet Address Range (CIDR Block)
- NAT Gateway
- Network Security Group (if any)
- Route Table (if any)
- Service Endpoints
- Subnet Delegation
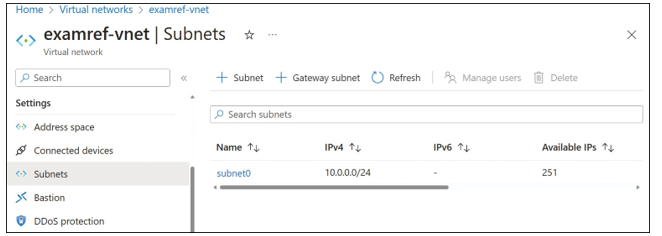
FIGURE 4-3 Subnets for the ExamRef-VNet virtual network
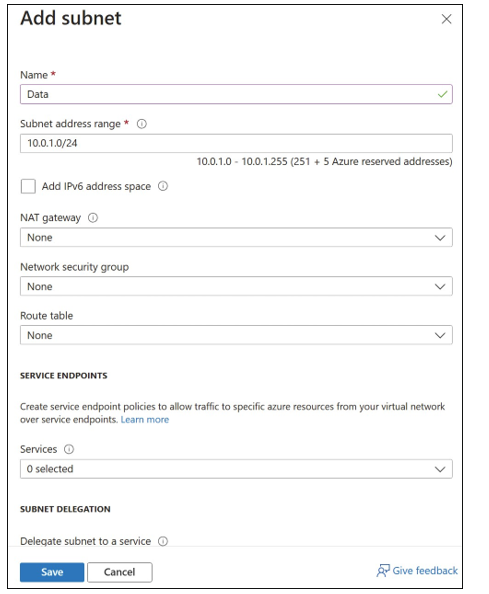
FIGURE 4-4 Add Subnet blade
Create and configure virtual network peering
VNet peering allows resources in two separate virtual networks to communicate directly by using their private IP addresses. The VNets can either be in the same Azure region or in sepa- rate Azure regions. Peering between VNets in different regions is called Global VNet peering. In all cases, traffic between peered VNets travels over the Microsoft backbone infrastructure, not the public internet. The peered VNets must have nonoverlapping IP address spaces.
Peering two virtual networks provides connectivity between the two VNets without requir- ing a VPN and virtual network gateway. This avoids the cost, throughput limitations, additional latency, and additional incurred complexity associated with using VNet gateways, though you can use VNet gateways to connect to on-premises networks using gateway transit.

There are no restrictions on connectivity between the peered VNets, so resources in peered VNets can communicate with each other as if they are in the same VNet. In addition, the Virtu- alNetwork service tag (described in Skill 4.2) spans the address space of both peered networks.
Alternatively, you can limit connectivity using the Allow Virtual Network Access option; there is no automatic outbound connectivity between peered VNets, and the VirtualNetwork service tag does not include the address space of the peered VNet. In this case, you control the connectivity between peered virtual networks using network security groups.
A simple example of VNet peering is shown in Figure 4-5. This shows two VNets that have been connected using VNet peering. This allows (for example), the WEB1 virtual machine in VNetA to connect to the MYSQL1 database in VNetB.
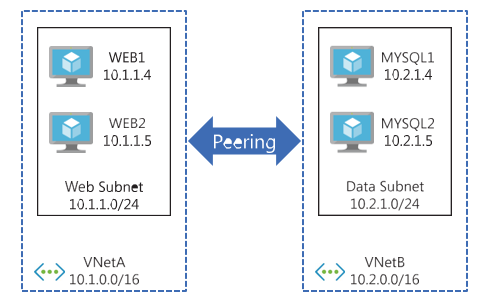
FIGURE 4-5 VNet peering between two virtual networks
After peering is established, traffic between VMs is routed through the Microsoft backbone infrastructure. Traffic does not pass over the public internet, even when using global VNet peering to connect VNets in different Azure regions.
While global VNet peering allows for open connectivity between virtual machines across VNets in different Azure regions, a VM can only connect to the front-end IP address of a basic internal Azure Load Balancer in the same region.
It is important to understand that VNet peering is a one-to-one relationship between two virtual networks. To create connectivity across three virtual networks (VNetA, VNetB, and VNetC), all three pairs must be peered (VNetA to VNetB; VNetB to VNetC; and VNetA to VNetC). This is illustrated in Figure 4-6.