Imagine a situation where you have a policy in your company that requires you to keep all logs coming from your workloads in a specific geographic region. Because the _Default log bucket is global (logs generated in a particular region are stored in this region), you must change this default behavior.
To modify the destination of logs in your project, you need to change the configuration settings in the Logs Router. The Logs Router is responsible for receiving logs, filtering them based on user-defined criteria, and forwarding them to specified destinations. Let’s see how we can adjust the Logs Router settings to send logs to a different location.
First, you will need to create a new log bucket by selecting CREATE LOG BUCKET in the Logs Storage section:
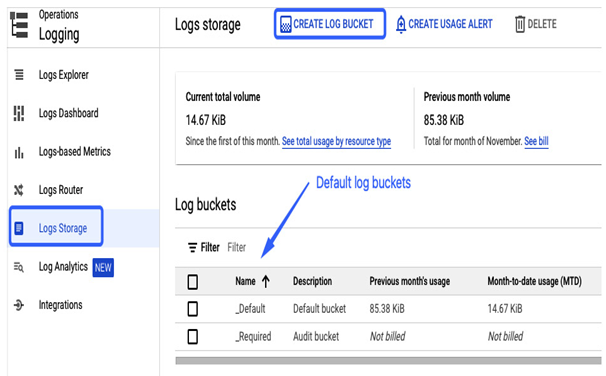
Figure 11.30 – Configuring a new log bucket
For the log bucket region, you can select a single region, global region, or multi-region such as the EU or US. The retention can be set between 1 and 3,650 days (around ten years) and modified later.
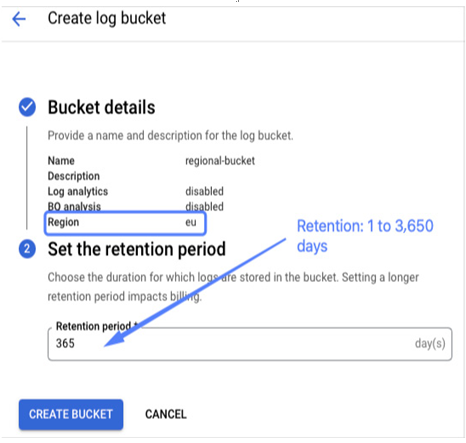
Figure 11.31 – Configuring a region and a retention period for a log bucket
Once a regional log bucket is created, you can either configure a new sink by selecting CREATE SINK in the Cloud Router section or edit an existing default one and point it to the new log bucket. If you create a new sink to replace the default one, you may want to build a new inclusion filter to include a specific subset of logs. Otherwise, all available logs will be routed to this new log bucket.
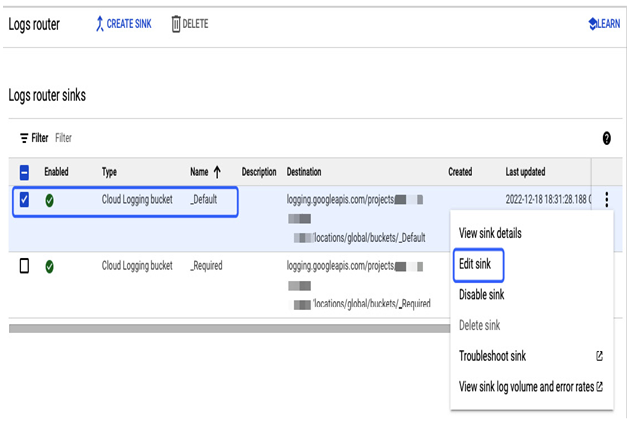
Figure 11.32 – Editing a default sink
To modify an existing _Default sink to send logs to a new log bucket, edit the sink and replace the existing bucket with your bucket in the Select a log bucket section and save the configuration:
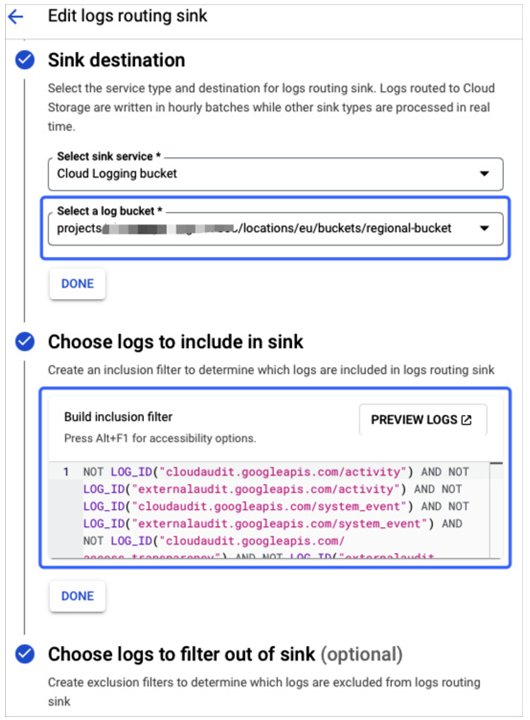
Figure 11.33 – Redirecting logs to a new log bucket
After the sink has been modified, the last step is to check that logs are now stored in the new log bucket. To ensure the sink works, go to Logs Explorer and select REFINE SCOPE. Then, in Scope by storage, select the new bucket.
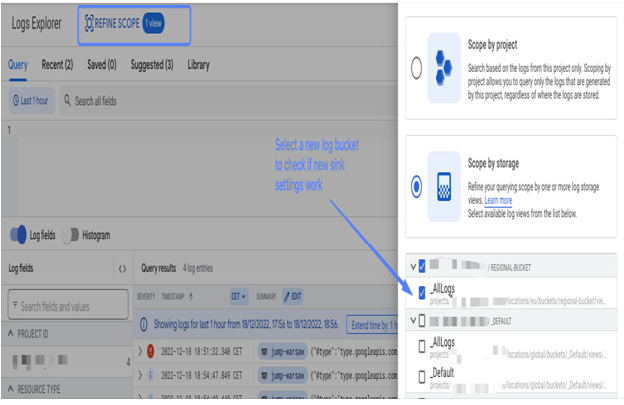
Figure 11.34 – Verifying that logs are stored in a new logs bucket
You should be able to see new logs appearing in the Query results section, as illustrated in the preceding screenshot.