The command-line interface consists of two steps. The first step is to create a disk, and the second is to attach it to the instance.
To create a disk, we will initiate the following command:
gcloud compute disks create additional-disk \
–zone=europe-west1-b\
–size=200GB \
–type=pd-balanced
The next step is to attach the newly created disk to the instance:
gcloud compute instances attach-disk instance-1 \
–disk additional-disk \
–zone=europe-west1-b
The commands were executed successfully, and we can check whether the disk was attached by running the following command:
gcloud compute instances describe instance-1 –zone=europe-west1-b
The output of the gcloud command shows the disk attached to the instance, as shown here:
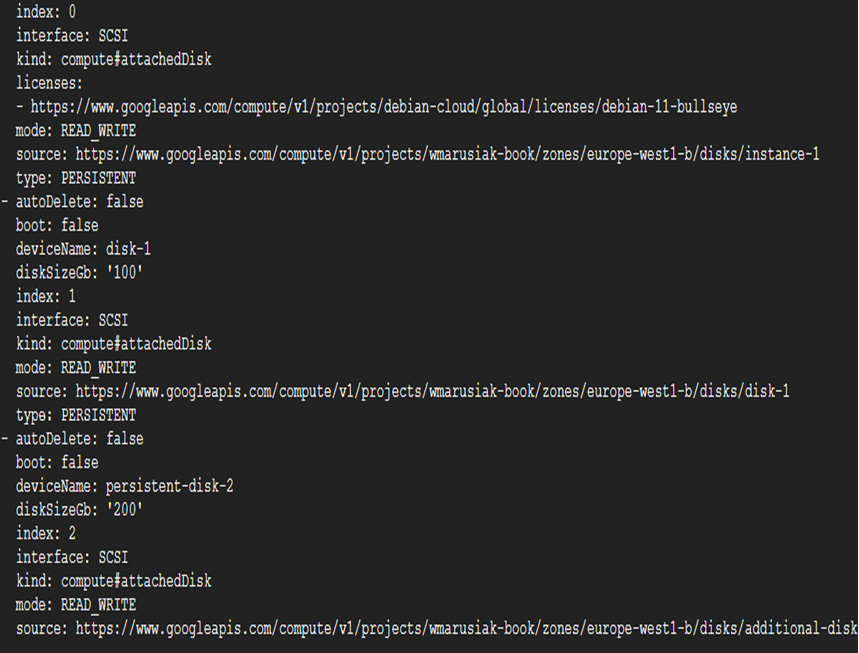
Figure 4.41 – A new disk is visible in the instance by using the command line
After learning how to add the additional disks to the instance, we will move on to the next section, which involves deleting the disk from the instances.
Deleting a disk from a VM
We will now demonstrate how to remove a 10-GB disk from an instance using the Cloud console and command-line tools. We want to mention one crucial piece of information here – we can’t delete a disk attached to an instance.
Console
In the console, navigate to Compute Engine, click on the desired instance, and choose Edit.
Once the instance details load, scroll to the storage section and remove the additional disk from the instance by clicking the X button.
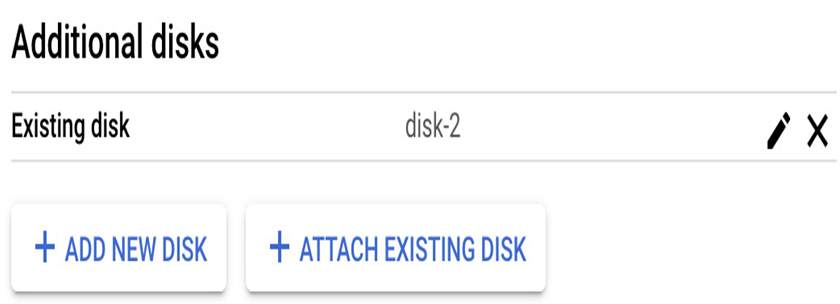
Figure 4.42 – Removal of the additional disk from the instance by clicking the X button
After clicking the Save button, the disk deletion is in progress. The deletion process depends on the setting in the deletion rule. When the disk is added, it can either be kept or deleted instantly.
Command line
Like adding a disk to the instance by using the command line, deleting the disk from the instance is a two-way process.
First, we need to edit the instance and detach the disk from it, and then we need to delete the detached disk.
In the command-line interface, we need to find the name of the disk device that we want to remove. Use the following command to find it out:
gcloud compute instances describe instance-1 –zone=europe-west1-b
The following screenshot shows the output of the preceding command:
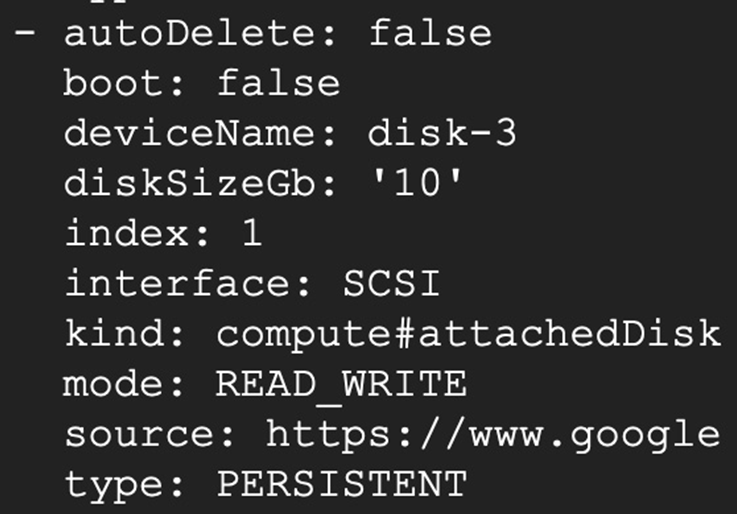
Figure 4.43 – The additional disk with its deviceName information
With the information about the deviceName flag, we can initiate a command to detach it from the instance:
gcloud compute instances detach-disk instance-1 –zone=europe-west1-b –device-name=disk-3
After a short period, removing the disk from the instance is finished.
To completely delete the detached disk, we need to execute the following command:
gcloud compute disks delete deviceName
The following figure shows the output of the command:
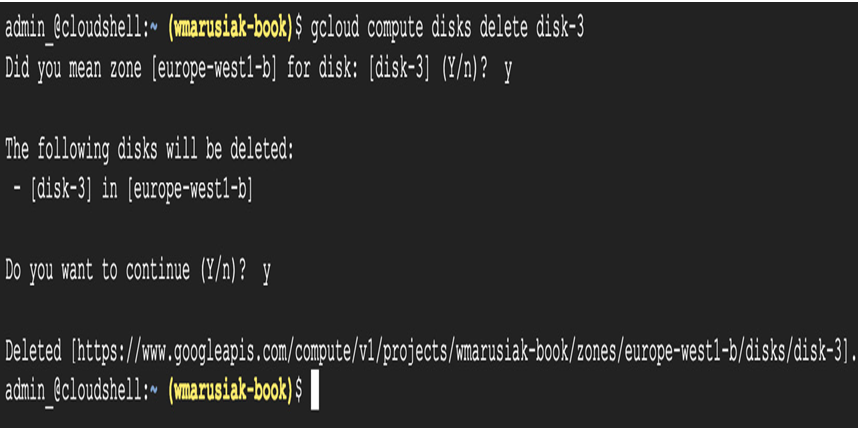
Figure 4.44 – The additional disk with its deviceName information
Disk deletion was completed.