Lab: Creating Your Free Tier Account
If you do not already have a Free Tier account with AWS, it is time for you to create one. Follow these steps:
Step 1. Search online for AWS Free Tier. Select the link from Amazon for the Free Tier account.
Step 2. Click the Create a Free Account button, as shown in Figure 6-1.
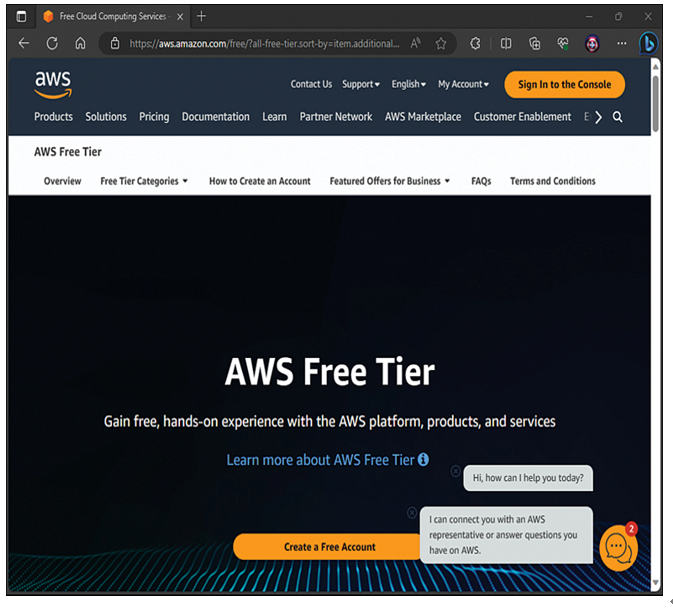
Figure 6-1 The Create a Free Account Button
Step 3. On the Sign Up for AWS page (shown in Figure 6-2), provide your root user email address and your AWS account name. The root user email address is critical and will be the username entry when you log in to this all-powerful root account. You should select an email address that you will have uninterrupted access to for the foreseeable future. The account name is how your account will display in AWS. This is not nearly as critical and can be changed at any time. When you have completed the two fields, click the Verify Email Address button.
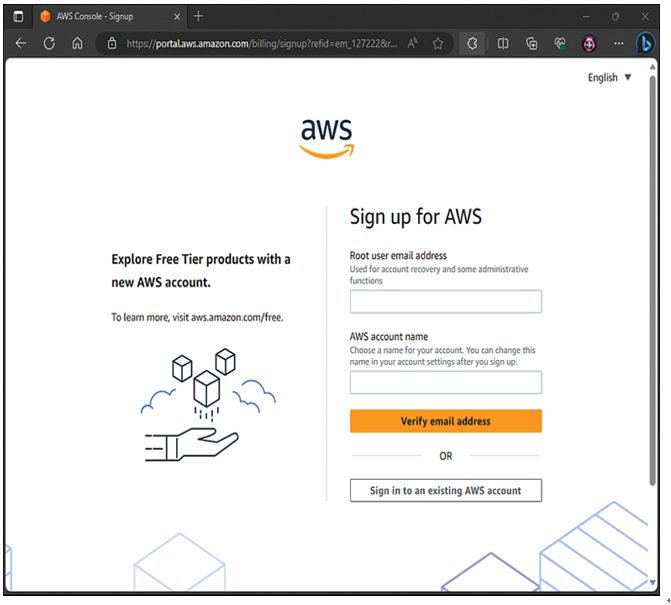
Figure 6-2 The Sign Up for AWS Page
Step 4. Enter your verification code that was emailed to your root account email address you provided in Step 3. Click Verify.
Step 5. Enter and confirm the root user password and click Continue (step 1 of 5).
Step 6. Choose Business or Personal for your account and fill in your basic contact information. Click Continue (step 2 of 5).
Step 7. Provide your payment information. Keep in mind that you are not charged anything in the first year provided that you do not exceed your Free Tier limits. This payment method is charged for services in excess of the free tier and will be charged when your account leaves the Free Tier duration of 1 year. Click Continue (step 3 of 5).
Step 8. Provide the phone number for your phone verification and input the security check to confirm your identity. Click Continue (step 4 of 5).
Step 9. In the Select a Support Plan window, choose your support option. Note that there is only one free plan: the Basic Support plan. When you are finished, click Complete Sign Up.
Step 10. Sign in to your new AWS account, using the email address you specified during the account creation. Remember that this is your root AWS account. You should use this account to create “standard” admin accounts for management of AWS, and you should very rarely need to log in to this powerful root account.
You are now ready to explore the wonders of AWS. Figure 6-3 shows the welcome screen for the AWS Management Console.
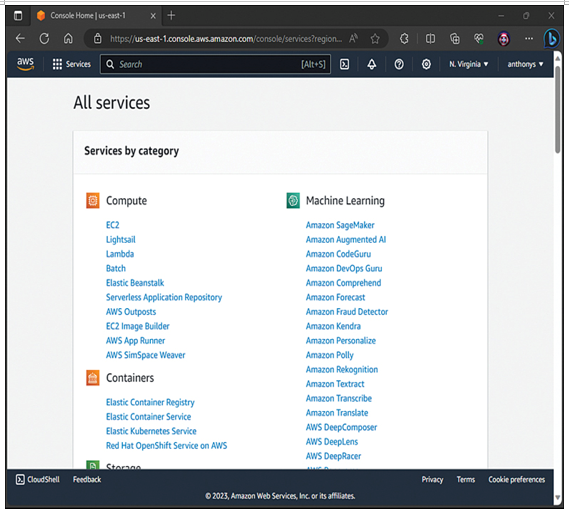
Figure 6-3 The AWS Management Console