The most popular option to create Pods using the command line is to use two main commands.
The first option is to use the kubectl apply -f filename.yaml command, where the YAML file contains all details of the Pod.
If you don’t know how to create a Pod YAML file, you can use an example from the Pod deployment section of this chapter or use the following command:
kubectl create deployment dry_run_deployment –image=busybox –dry-run=client –output=yaml
The output of the previous command shows ready-to-be-used YAML code:
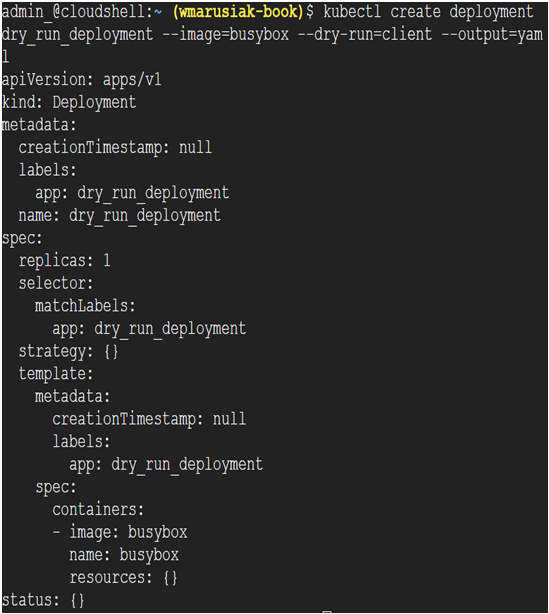
Figure 6.35 – Output of kubectl –dry-run command in YAML format
This generates a base deployment based on the selected image, which can be saved as a YAML file on a computer and edited to make changes. The most important section of that command is the –dry-run=client –output=yaml part, which previews the object that would be sent to the cluster without submitting it.
Now we’ve learned how to create deployments using saved YAML files on a computer, we can move on to creating Pods using kubectl to create deployment parameters. Simple Pod creation needs name and image parameters, as follows:
kubectl create deployment pod_name –image=image_name
A sample command to create a deployment with the name nginx-gke-autopilot, which uses nginx as a source image, is shown as follows:
kubectl create deployment nginx-gke-autopilot –image=nginx
This section concludes by adding both Cloud console and the CLI.
In the next section, we learn how to modify Pods.
Modification of Pods is possible by using different methods. Those methods may vary due to the different application deployment possibilities. Suppose we have an application deployed as a ReplicaSet and want to modify the number of usable Pods. In that case, we can edit the YAML deployment file, modify it, and redeploy it. We could get the existing workload YAML configuration file, save it as a local file, and redeploy it with changes.
Cloud console
Modifying running Pods in Cloud console is possible via the Workloads section in Cloud console. Our sample application, named frontend, is deployed as a ReplicaSet with three Pods as the desired state. To change the number of Pods, we need to click on the name of the workload:
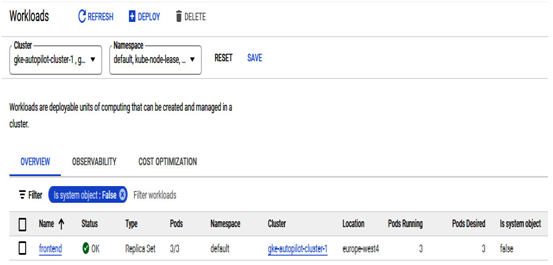
Figure 6.36 – ReplicaSet deployment visible in the Workloads section of Cloud console
After selection, we are redirected to the workload details, where we can see the workload details and edit them.
When we click the EDIT button, the browser-based code editor allows us to edit the workload. In our case, we will replace the number of desired Pods from three to five:
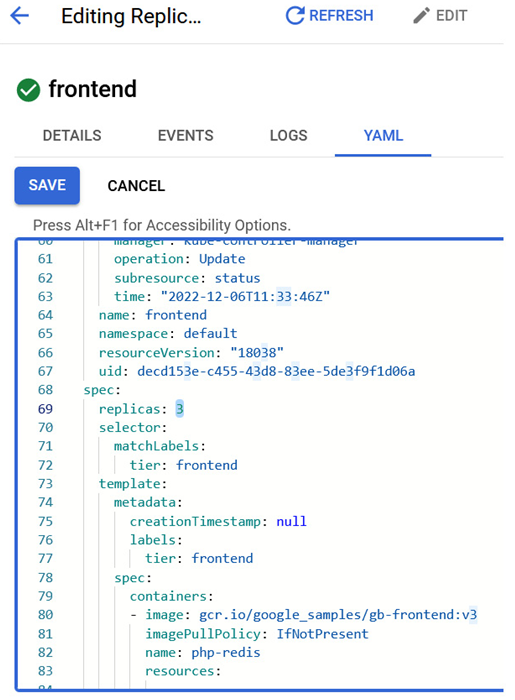
Figure 6.37 – Web-based editor that allows editing of the workload
If your GKE cluster has enough resources to run the desired number of Pods, they will be scheduled and available. After a moment, new Pods are created and ready to be used:
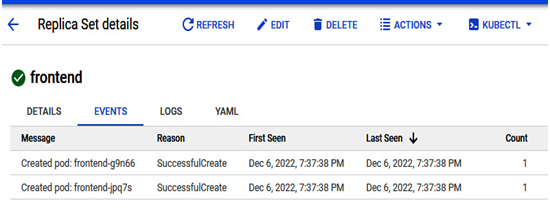
Figure 6.38 – Two new Pods added to the ReplicaSet
Of course, those aren’t the only possible settings we can adjust, and we encourage you to experiment with them.