To enable Config Connector in the existing GKE cluster, we must enable the Config Connector add-on, enable Workload Identity, and create an Workload Identity:
- Prior to doing any work with the existing GKE cluster, we need to authenticate with it to be able to run any command
- We can use following command:
gcloud container clusters get-credentials YOUR_CLUSTER_NAME
–zone=ZONE –project=YOUR_PROJECT_NAME
NAME - Once authenticated, we can enable Workload Identity on the existing cluster with the following command:
gcloud container clusters update CLUSTER_NAME
–region=COMPUTE_REGION \
–workload-pool=PROJECT_ID.svc.id.goog - In our case, we used following code:
gcloud container clusters update cluster-1 –region=us-central1-c –workload-pool=wmarusiak-book.svc.id.goog - Then, we need to enable Config Connector. To do this, we need to use following gcloud command:
gcloud container clusters update CLUSTER_NAME –zone=YOUR_ZONE –update-addons ConfigConnector=ENABLED
After enabling the Config Connector add-on and Workload Identity in an existing GKE cluster, we can proceed with IAM resources creation.
Config Connector creates and manages Google Cloud resources by using an Identity and Access Management (IAM) service account to authenticate with Google Cloud. It then uses GKE’s Workload Identity to bind the IAM service account to a Kubernetes service account. This allows Config Connector to access and manage Google Cloud resources on behalf of the Kubernetes cluster.
- First, we need to create a workload identity. We need one because Config Connector authenticates with IAM to create and manage Google Cloud resources.
- We will create a new service account using the following code:
gcloud iam service-accounts create gke-workload-identity-sa - Next, we must grant elevated permission to the IAM service account in our project. Similar to the Pub/Sub section, please change the project and other values used in the following commands:
gcloud projects add-iam-policy-binding wmarusiak-book –member=”serviceAccount:[email protected]” –role=”roles/editor” - The last step is to create an IAM policy binding between the IAM service account and the predefined GKE service account that Config Connector uses. To do so, we need to run the following command:
gcloud iam service-accounts add-iam-policy-binding [email protected] –member=”serviceAccount:wmarusiak-book.svc.id.goog[cnrm-system/cnrm-controller-manager]” –role=”roles/iam.workloadIdentityUser” - Now, we need to create the configconnector.yaml file with the following content. To apply it to the existing GKE cluster, we need to run the kubectl apply -f configconnector.yaml command:
configconnector.yaml
apiVersion: core.cnrm.cloud.google.com/v1beta1
kind: ConfigConnector
metadata:
the name is restricted to ensure that there is only one
ConfigConnector resource installed in your cluster
name: configconnector.core.cnrm.cloud.google.com
spec:
mode: cluster
googleServiceAccount: “[email protected]” - After a moment, we can check if the Config Connector resources have been created. We can use the kubectl get pods -A | grep config command:
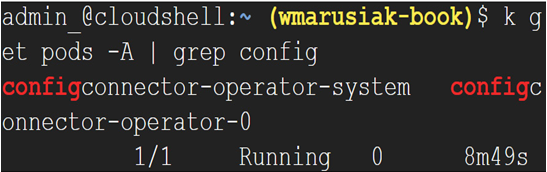
Figure 7.29 – Config Connector resources created in the kube-system namespace
- We must configure the resource destination before creating any resource with Config Connector. Resources can be created at the project, folder, or organization level. But first, we must create a GKE namespace. we will use the following command:
kubectl create namespace config-connector - I will choose to organize resources at the project level. I will use the following command to configure this:
kubectl annotate namespace config-connector cnrm.cloud.google.com/project-id=project_ID
If you wish, you can organize resources at the folder level by changing the annotation to kubectl annotate namespace config-connector cnrm.cloud.google.com/folder-id=config_connector_folder or kubectl annotate namespace config-connector cnrm.cloud.google.com/organization-id=ORGANIZATION_ID.
- To verify the installation, we can run the following command:
kubectl wait -n cnrm-system –for=condition=Ready pod
–all
We will get the following output:
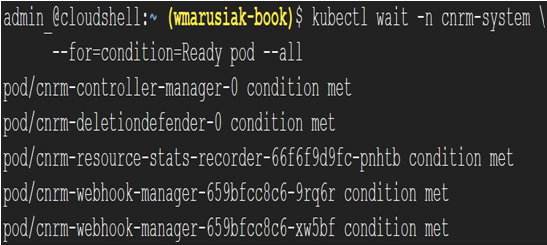
Figure 7.30 – Config Connector is correctly installed in the cluster
Now that we’ve learned how to configure Config Connector on the newly created GKE cluster and existing GKE cluster, we can create, modify, and delete Google Cloud resources.