Forced tunneling
A special case is when routes are configured with the destination IP prefix 0.0.0.0/0. Given the precedence rules described earlier, this route controls traffic destined for any IP address not covered by any other rules.
By default, Azure implements a system route directing all traffic matching 0.0.0.0/0 (and not matching any other route) to the internet. If you override this route, this traffic is instead directed to the next hop you specify. By using a VPN Gateway as the next hop, you can direct all internet-bound traffic over your VPN connection to an on-premises network security appliance. This is known as forced tunneling.
Configure user-defined routes using the Azure portal
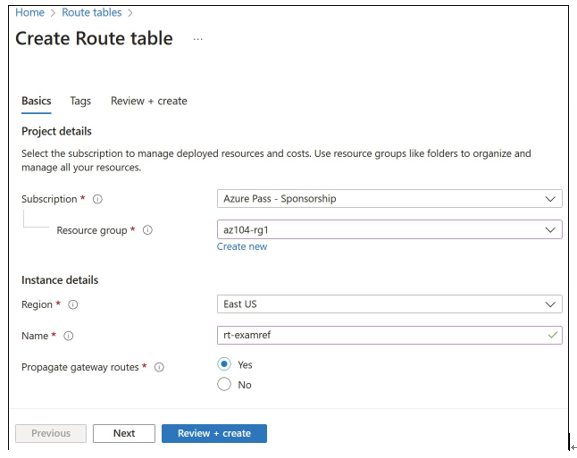
To configure user-defined routes, first create a Route Table resource. From the Azure portal, search for Route Tables. On the Route Tables blade, click Create to open the Create Route Table blade, as shown in Figure 4-15. Select options from the Subscription and Resource Group drop-down menus, enter a name for the route table, and specify the route table region, which must be the same Azure region that the subnets use with this route table.
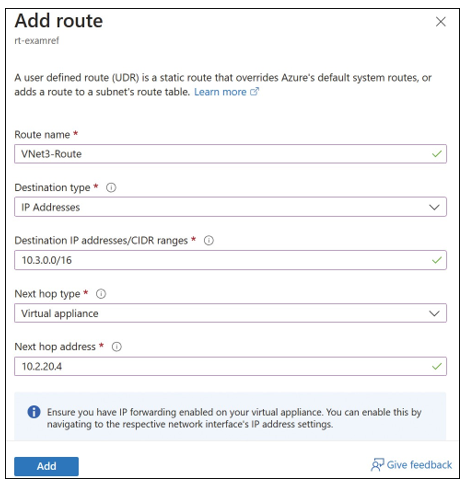
Having created the route table, the next step is to define the routes. Open the Route Table blade, and under Settings, click Routes to open the list of routes in the route table. Then click Add to open the Add Route blade, as shown in Figure 4-16.

FIGURE 4-15 The Create Route Table blade in the Azure portal

FIGURE 4-16 The Add Route blade in the Azure portal
Repeat this process for each custom route in the route table.
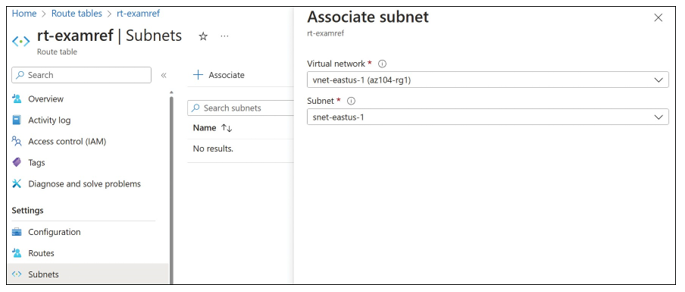
The final step is to specify which subnets this route table should be associated with. This can be configured either from the subnet, or from the route table. In the latter case, from the Route Table blade, under Settings, click Subnets to open the list of subnets associated with the route table. Click Associate to open the Associate Subnet blade, as shown in Figure 4-17.

FIGURE 4-17 The Associate Subnet blade for a route table in the Azure portal
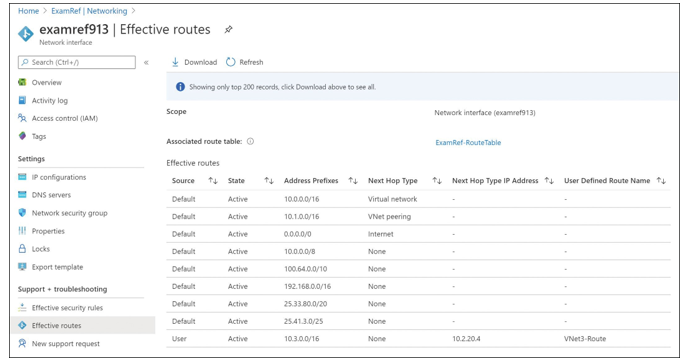
To see the effective routes for a given network interface, navigate to the network interface blade in the Azure portal and then click Effective Routes to open the Effective Routes blade, as shown in Figure 4-18.

FIGURE 4-18 The list of effective routes for the examref913 network interface
