Suppose you were asked to create a small but critical PostgreSQL database for an application that would run on a Compute Engine Linux VM, VM-a, in a my-subnet subnet in the europe-central2 region. The owner of the application is concerned about a potential latency between the database and their application. Also, although lightweight, the database needs to be highly available. In addition, the owner should be able to recover data from a specific time point within 7 days, and backups can only run within a 4-hour window during the night. Furthermore, the database can’t be accessed from the internet.
The following diagram presents an example of how a Compute Engine VM can connect to a PostgreSQL database via a private network. We could use this approach to address the requirements of our task. Note that more information about networking will be presented in Chapter 9.
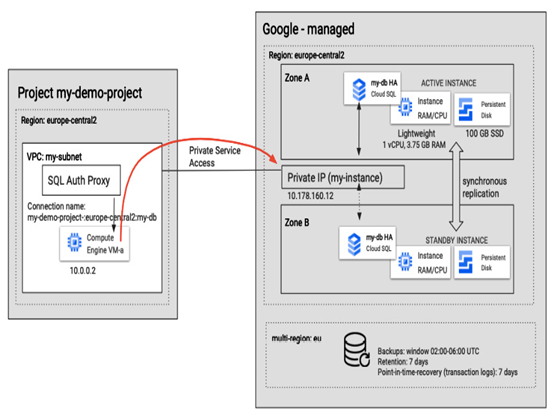
Figure 8.27 – Connecting to a PostgreSQL database from a VM via Private service access
Here are the steps that will guide you through the setup:
- First, let’s create a database. To create a SQL instance, go to the DATABASES section in the main menu of the Google Cloud console:
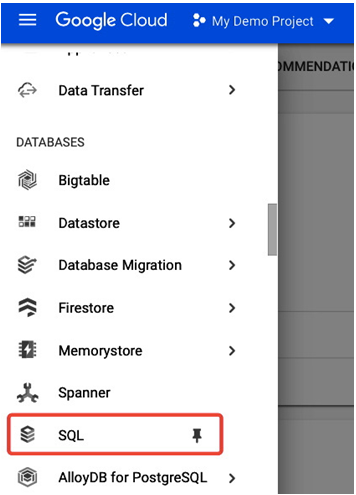
Figure 8.28 – The DATABASES section of the main menu
- Out of the three available database engines, in this example, we will create a PostgreSQL instance by selecting Create an instance and then choosing PostgreSQL:
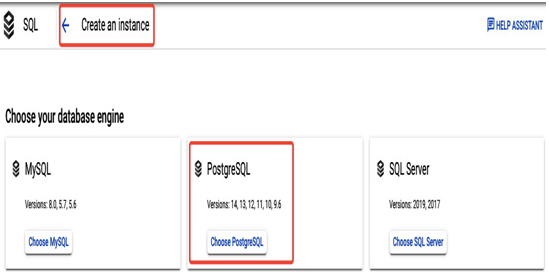
Figure 8.29 – Three database engines offered by Cloud SQL
- In the next step, we provide the instance ID, my-instance, a password for the default postgres user, and the required version of the engine. Next, we select a predefined instance configuration (Production for critical workloads, or Development, a cost-optimized version). In our case, we need to provide high availability for the database, so we choose Production. Finally, note that on the right-hand side, there is a Summary section, which shows the most current setup and performance characteristics:
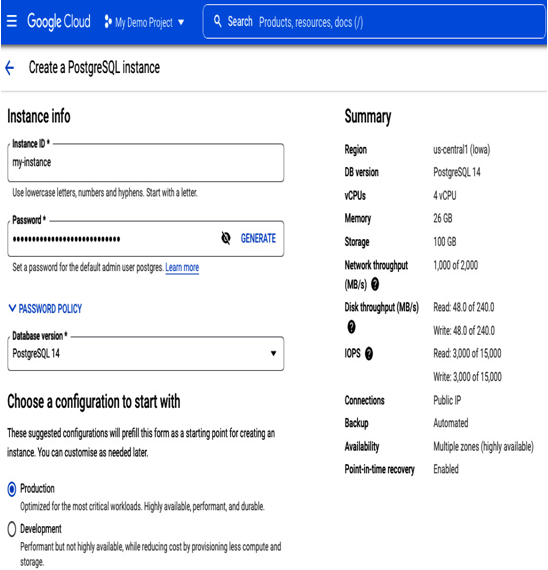
Figure 8.30 – Creating a PostgreSQL instance
- In the next step, we select a region where we want the instance to be deployed. For the minimal latency between the VM and the database, we select the same region where the VM is running: europe-central2. Also, as the database must be highly available, we select a multi-zonal availability:
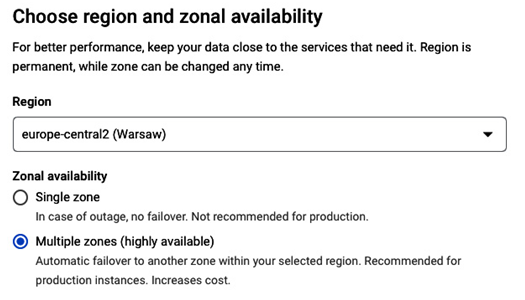
Figure 8.31 – Selecting a region and an availability type for a PostgreSQL instance
- In the Customize your instance section, you can choose its machine type (memory and cores), storage type (HDD or SSD), and disk capacity. In our example, although the database needs to be highly available, it doesn’t need high performance, so we will override the predefined settings and deploy a Lightweight machine type with 1vCPU and 3.75 GB of RAM, and set Storage type as SSD and 10 GB.
- In the Connections section, we configure the instance to be accessible only internally via Private IP and select the same VPC where the application is running – my-network for this connection. The private services access needs to be set up for the private communication to work, so we follow the SET UP CONNECTION wizard, selecting the default options. We will use Cloud SQL Auth Proxy installed inside VM-a to connect to the database:
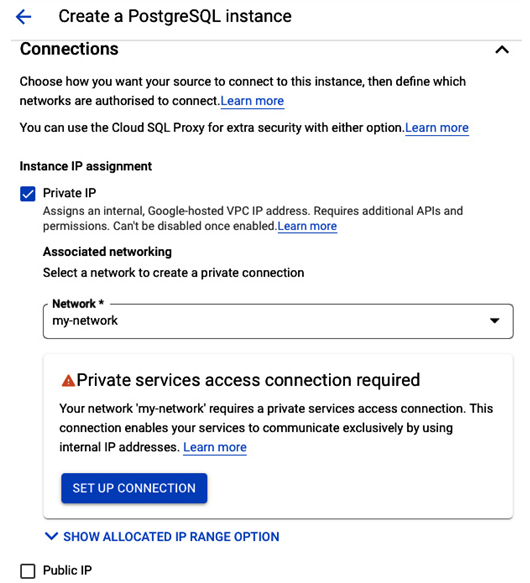
Figure 8.32 – Network configuration for a PostgreSQL instance
- In the Data protection section, we select the 4-hour backup window to match the task’s requirements and the default location where backups will be stored, which is the closest multi-region location to the database instance. The default retention is to keep 7 backups. We also need to enable point-in-time recovery and store 7 days of logs.
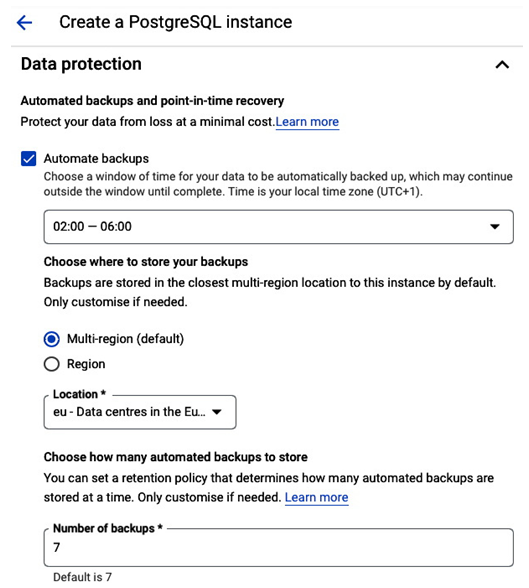
Figure 8.33 – Configuring backups for PostgreSQL instance
- Select Create Instance and wait till it is available. It usually takes a few minutes. Once the instance is ready, you can select it to view more details:
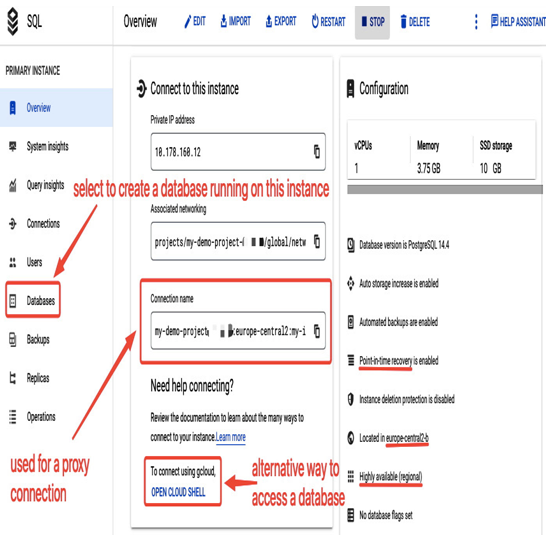
Figure 8.34 – Details of the PostgreSQL instance, my-instance
- We need to create a PostgreSQL database that will run in my-instance. Select Databases from the menu and then CREATE DATABASE, providing its name: my-db. If you need to create additional users, you can do so in the Users section of the menu. To populate a database with data, you can use the IMPORT option to import data from a file uploaded to a Google Cloud Storage bucket:

Figure 8.35 – Importing data from a bucket
- Enable Cloud SQL Admin API in the project where VM-a is running. Ensure that the service account that the VM is configured with has a Cloud SQL Client role. Both settings are needed to connect to the database from the VM.
- SSH to VM-a and download Cloud SQL Auth Proxy:
wget https://dl.google.com/cloudsql/cloud_sql_proxy.linux.amd64 -O cloud_sql_proxy
- Make it executable:
chmod +x cloud_sql_proxy
- Start the proxy to my-instance:
./cloud_sql_proxy -instances=my-demo-project:europe-central2:my-instance=tcp:5432 &
The application running on VM-a can use the local proxy to connect to the database, my-database. You can also connect to the database and access its content using the following command:
psql “host=127.0.0.1 port=5432 sslmode=disable dbname=my-database user=postgres”
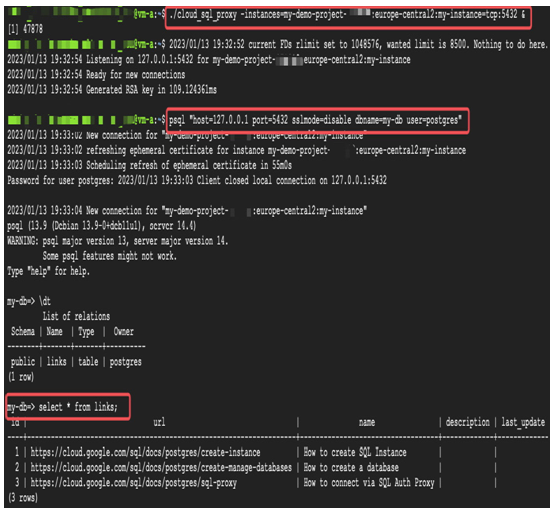
Figure 8.36 – Starting Cloud SQL Auth Proxy inside VM-a and accessing the my-db PostgreSQL database
In addition to the application’s access to the database, the application owner could use integration with BigQuery to share database data with his analytics team. For example, if the instance was created with a Public IP instead of using a private service access communication, the analytics team could connect to Cloud SQL, not from a VM as in this example excercise, but from BigQuery directly and run federated queries on the PostreSQL database:
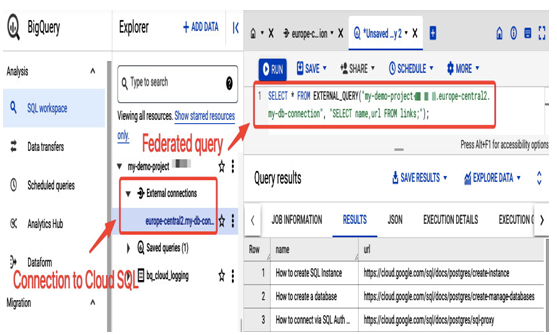
Figure 8.37 – Using BigQuery integration with Cloud SQL
The preceding figure shows an example of how a federated query in the BigQuery view looks once the external connection to Cloud SQL is created.
