There is no one-size-fits-all solution, so it is up to how you want approvals to work for your org. You should be very careful when using the record lock permission, as when a record is locked, no workflow, process builder, or trigger can modify that record until and unless we unlock the record itself.
For our scenario shown in the previous screenshot, let’s select the Manager field on the Next Automated Approver Determined By picklist and select the Use Approver Field of Opportunity Owner checkbox.
4. Click Next to jump to the next section:
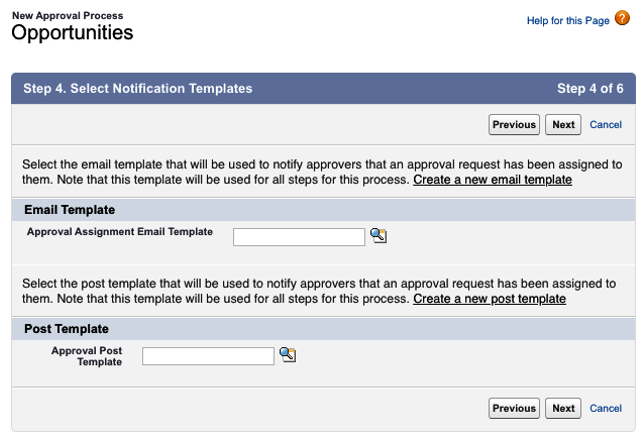
New approval wizard, Step 4 – defining the notification templates
This step is used to set up email and Chatter post templates for the approval request notification. Leave a blank field if you want to use the standard email and Chatter post templates. Let’s now have a quick reminder about Chatter notifications:
- To enable approvals on Chatter, go to Setup | Features Settings | Chatter | Chatter Settings, look for the Approval Posts section, and flag Allow Approvals.
- To create a new Post Template, go to Setup | Process Automation | Post Templates, as shown in the following example:
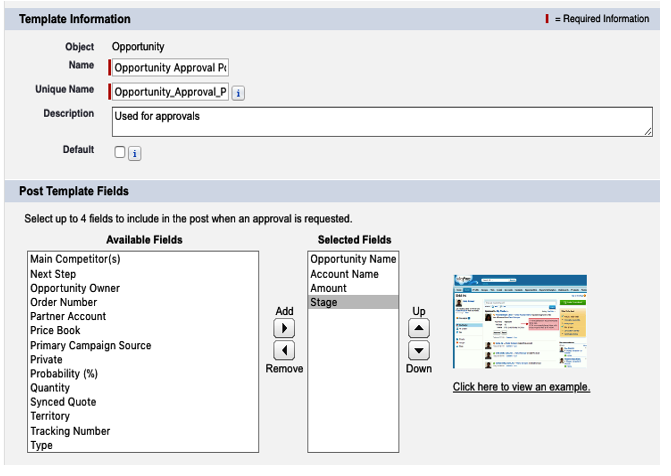
Post template creation
The post is basically used to define the fields to be displayed when the approval is notified (click on the example image to have a look at how the post looks in Classic).
In Step 4, leave the Email Template and Post Template fields blank and click Next.
5. You will see the following screen. This step configures the approval page, which is the page where the approver responds to an approval request, as shown in the following screenshot:
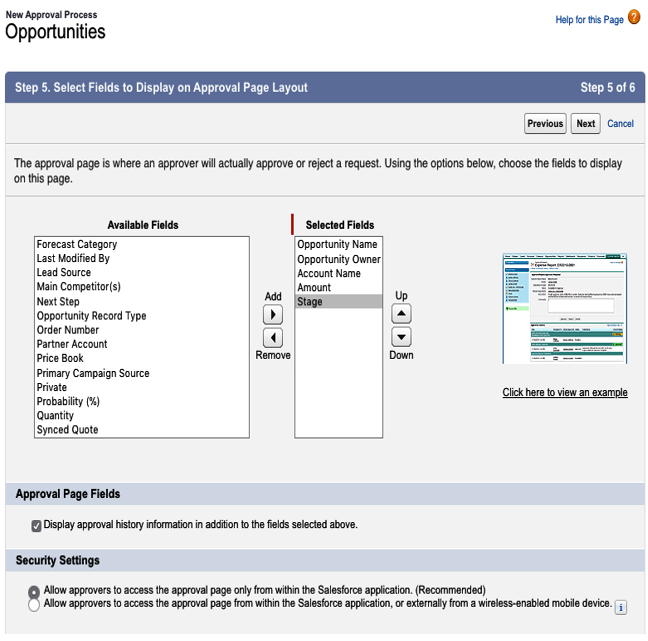
New approval wizard, Step 5
The first thing to select is the list of fields to be displayed to the approver. You should select only the most important fields as this page can be viewed using a mobile device, so too many fields can make the approval page uncomfortable for the approver.
In the Approval Page Fields section, check the Display approval history information in addition to the fields selected above option only if you want to display all of the approval history in a dedicated section of the approval page (the example screenshot gives you a hint of what the page may look like in Classic style).
Last but not least, you can decide to show the approval page only to authenticated users (this is, of course, the recommended option) or by using a mobile device, but without authentication (this way is less secure but, for sure, easier to use for approvers that are usually on the move).
6. Click Next for the last step:
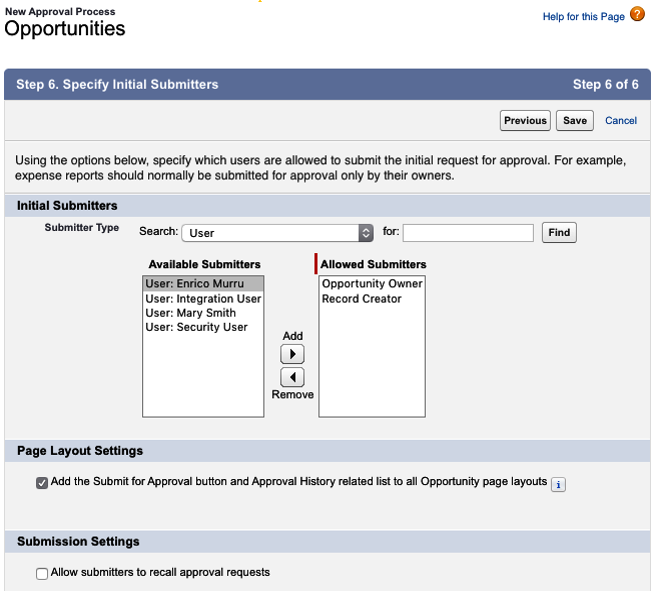
New approval wizard, Step 6
The first section allows us to select which users should be able to submit a record for approval. It gives us the following options:
- Record-related users (such as the creator or owner)
- Specific users
- Specific roles and subordinates
If the user who is watching the record does not belong to the categories selected in this list, they won’t be able to submit a record for approval.
The Page Layout Settings are used to automatically add the Submit for Approval button and the Approval History related list to the object layouts.
The last option allows the submitter to recall an approval request; this may be useful when the conditions on the submitter side change over time.
- Now click Save. A quick popup will appear to help you decide what you want to do next:
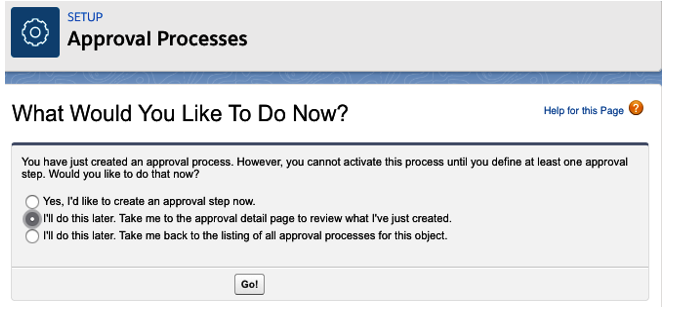
Last step of the approval wizard
Select the second option to jump to the approval just created. The approval detail page is divided into two main parts:
- A details section that shows the main configurations on the current approval:
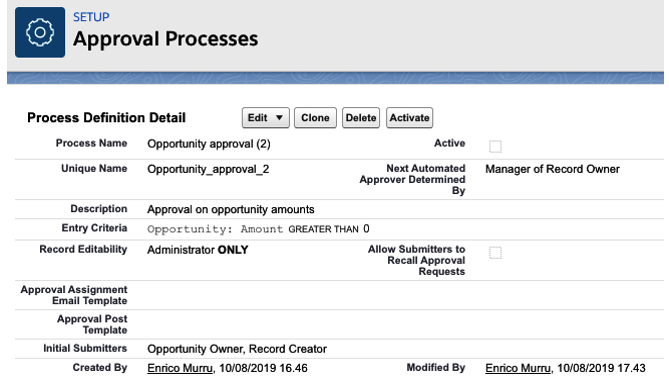
Approval details page
- The sections for the steps and actions related lists, which show everything about the approval steps and all other kinds of actions:
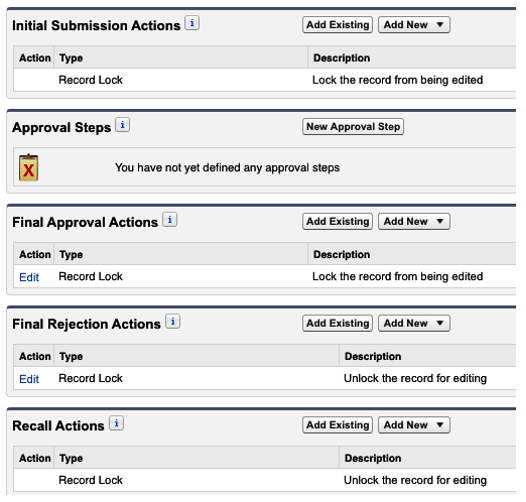
Approval actions and steps sections
Now that we have a brand new approval, we need to configure the steps that make up the approval process and the related actions that are automatically executed when a record is approved or rejected. Let’s dive into this in the next sections.
